Quick answer: Failing trim is almost always a paint adhesion issue — moisture infiltration, wrong primer, or skipped surface prep. Most trim can be saved with proper scraping, sealing, and a bonding primer instead of full replacement.
In this guide
Updated June 2026. Built from real PaintWerks trim repaints across Columbus and Central Ohio. Got peeling, cracking, or yellowing trim? Request a free walkthrough or call 614-582-4227.
The 5 Most Common Trim Failure Modes
Peeling trim is almost never bad luck. It is bad prep. After nine years walking Columbus homes I can spot the failure mode in about ten seconds, and almost every one traces back to the same handful of mistakes. Here are the 5 failure modes we see most.
1. Peeling Paint
Sheets or flakes lifting off baseboards, casings, and fascia. Almost always latex shot over old oil paint with no bonding primer, or a glossy surface that never got scuff sanded. The new film could not grab the old one so it lets go in sheets the first time the wood moves. Pre-2000 trim in Columbus homes is almost always oil alkyd. Someone rolled latex over it in 2010, skipped the bond coat, and now it is coming off in your hand. Dab denatured alcohol on a hidden spot. If the finish softens or transfers it is latex. If nothing happens it is oil and needs a bonding primer like INSL-X Stix before any waterborne topcoat goes on.
2. Cracking and Checking
Splits at caulk joints, miters, and across bare wood. Cheap painter caulk gives out in a season. Raw wood that skipped primer swells and shrinks with seasonal humidity until the topcoat cracks straight down the grain. MDF end cuts are the worst offenders. They wick moisture like a sponge and never stop moving. If cracks line up with miters it is caulk failure. If cracks run with the grain on flat stock it is bare wood that never got primed. Different problems, different fixes. Do not just caulk over a primer problem.
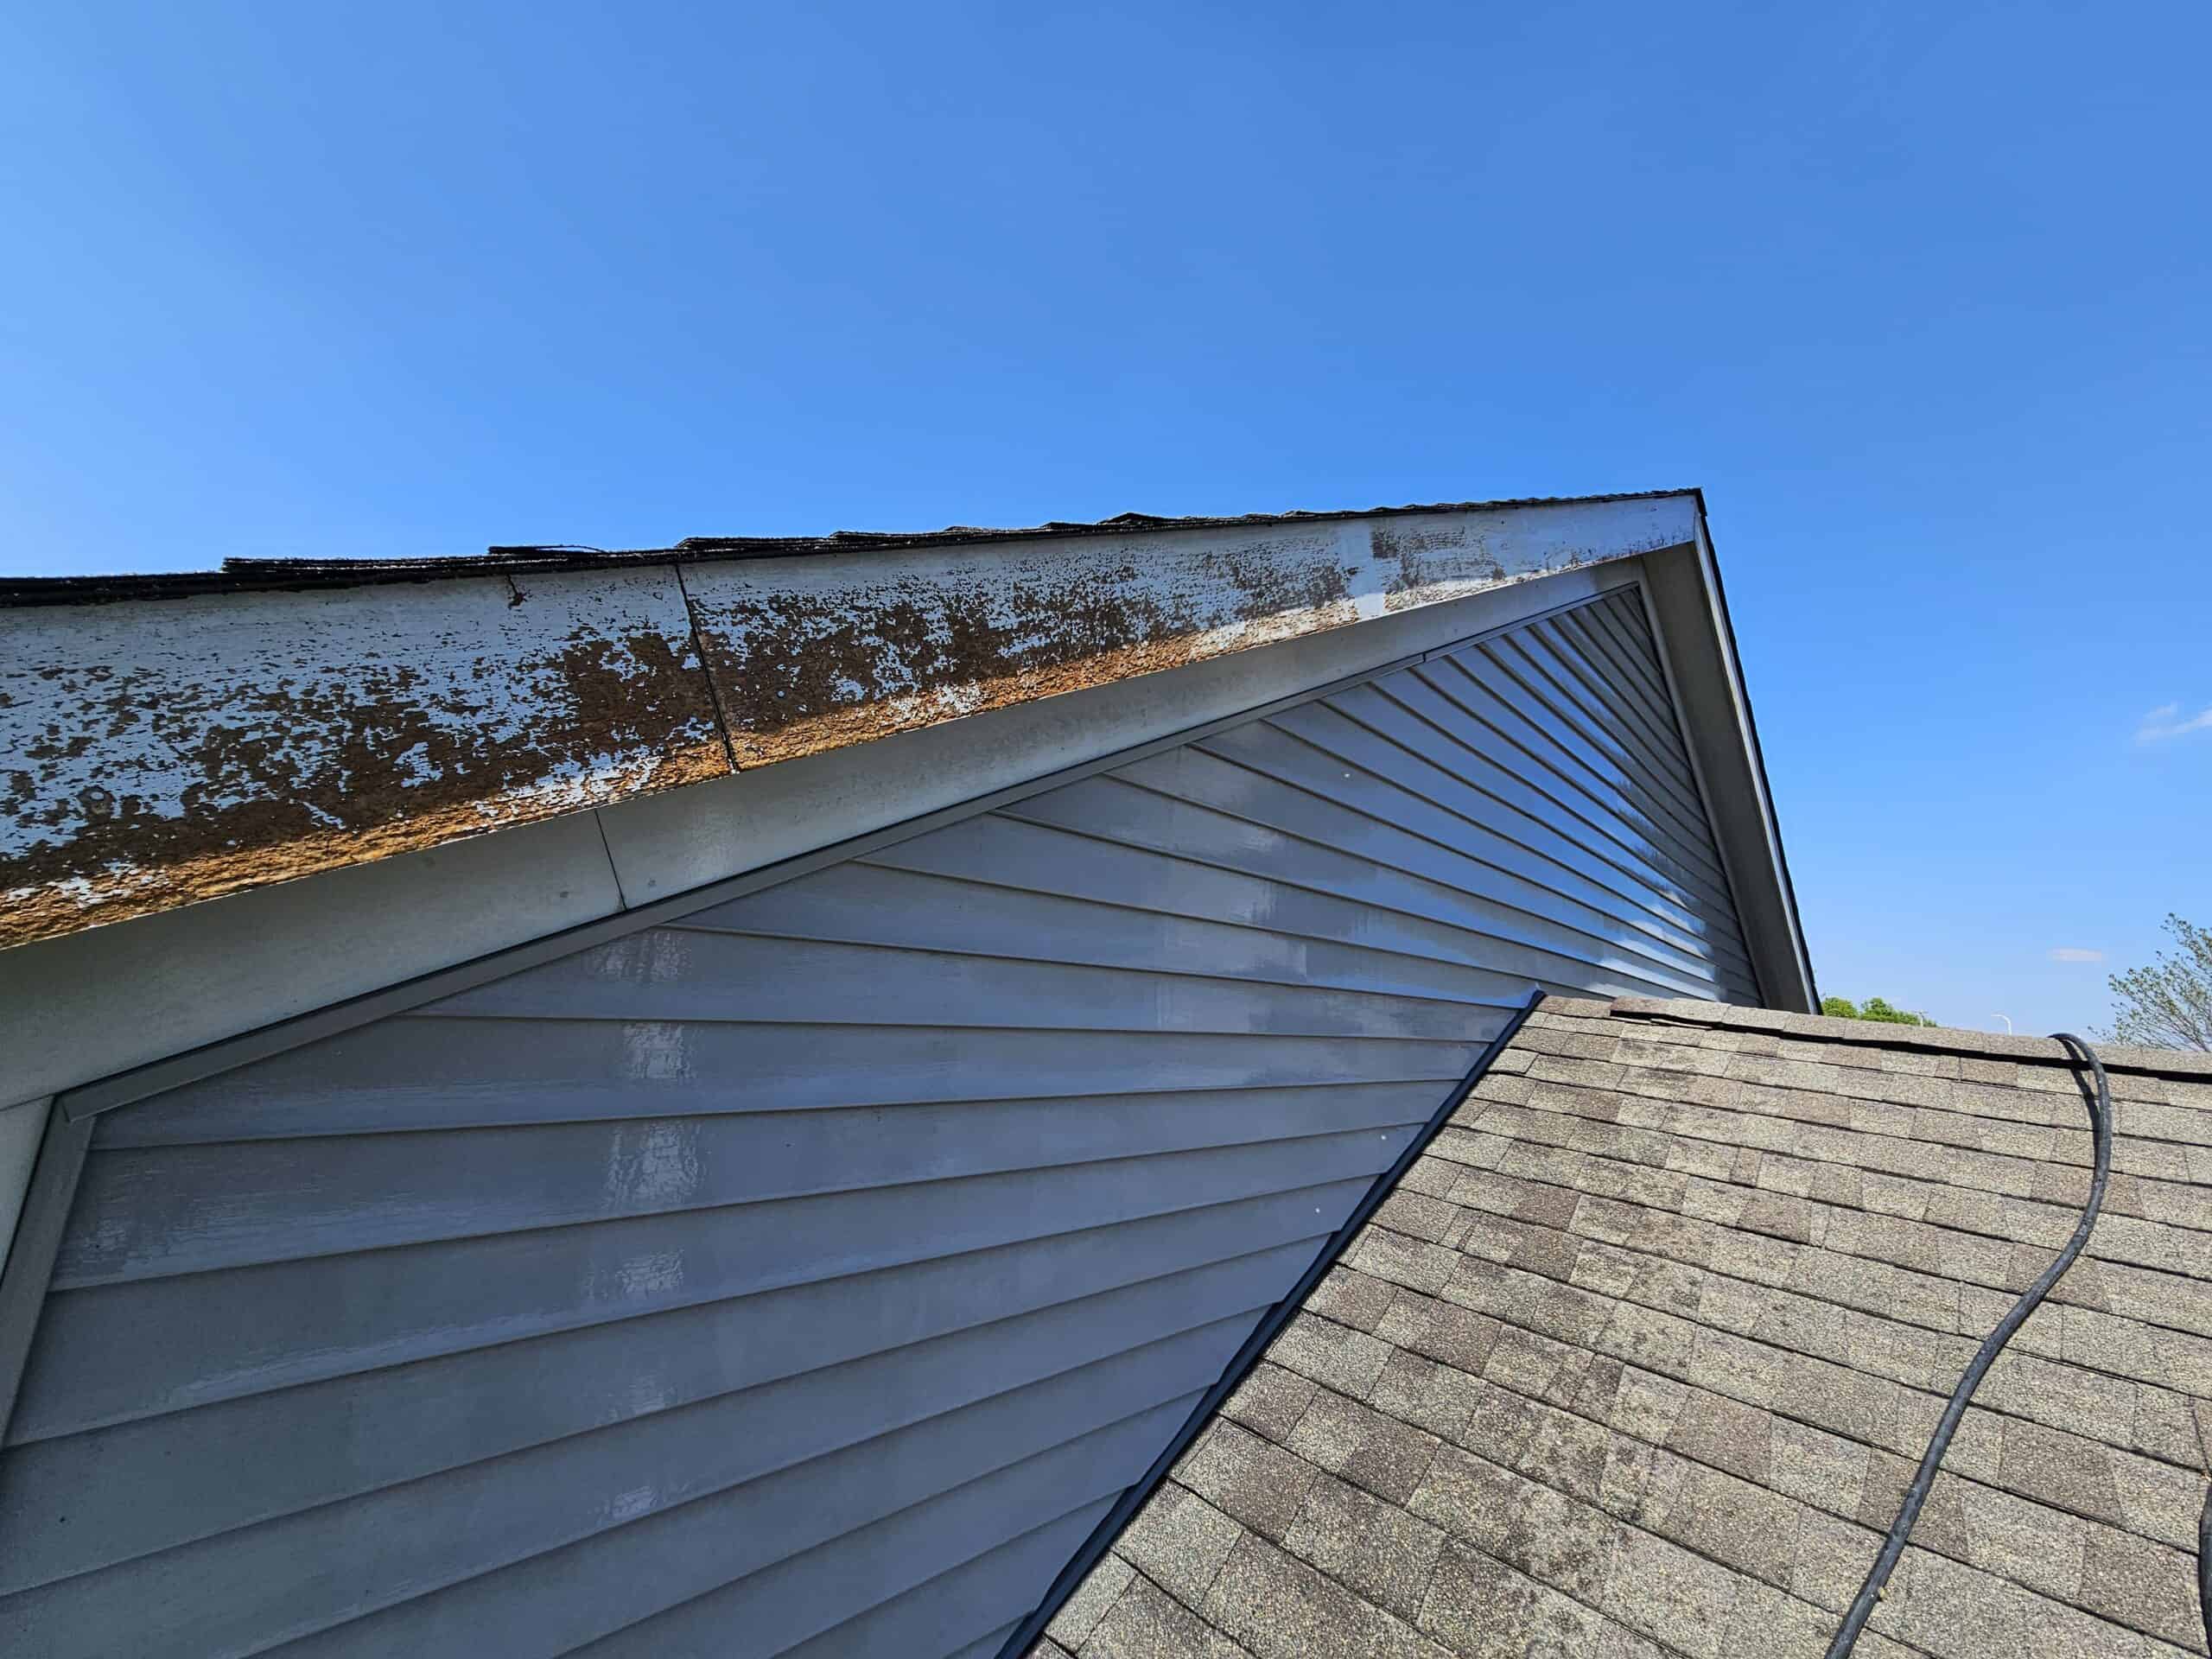
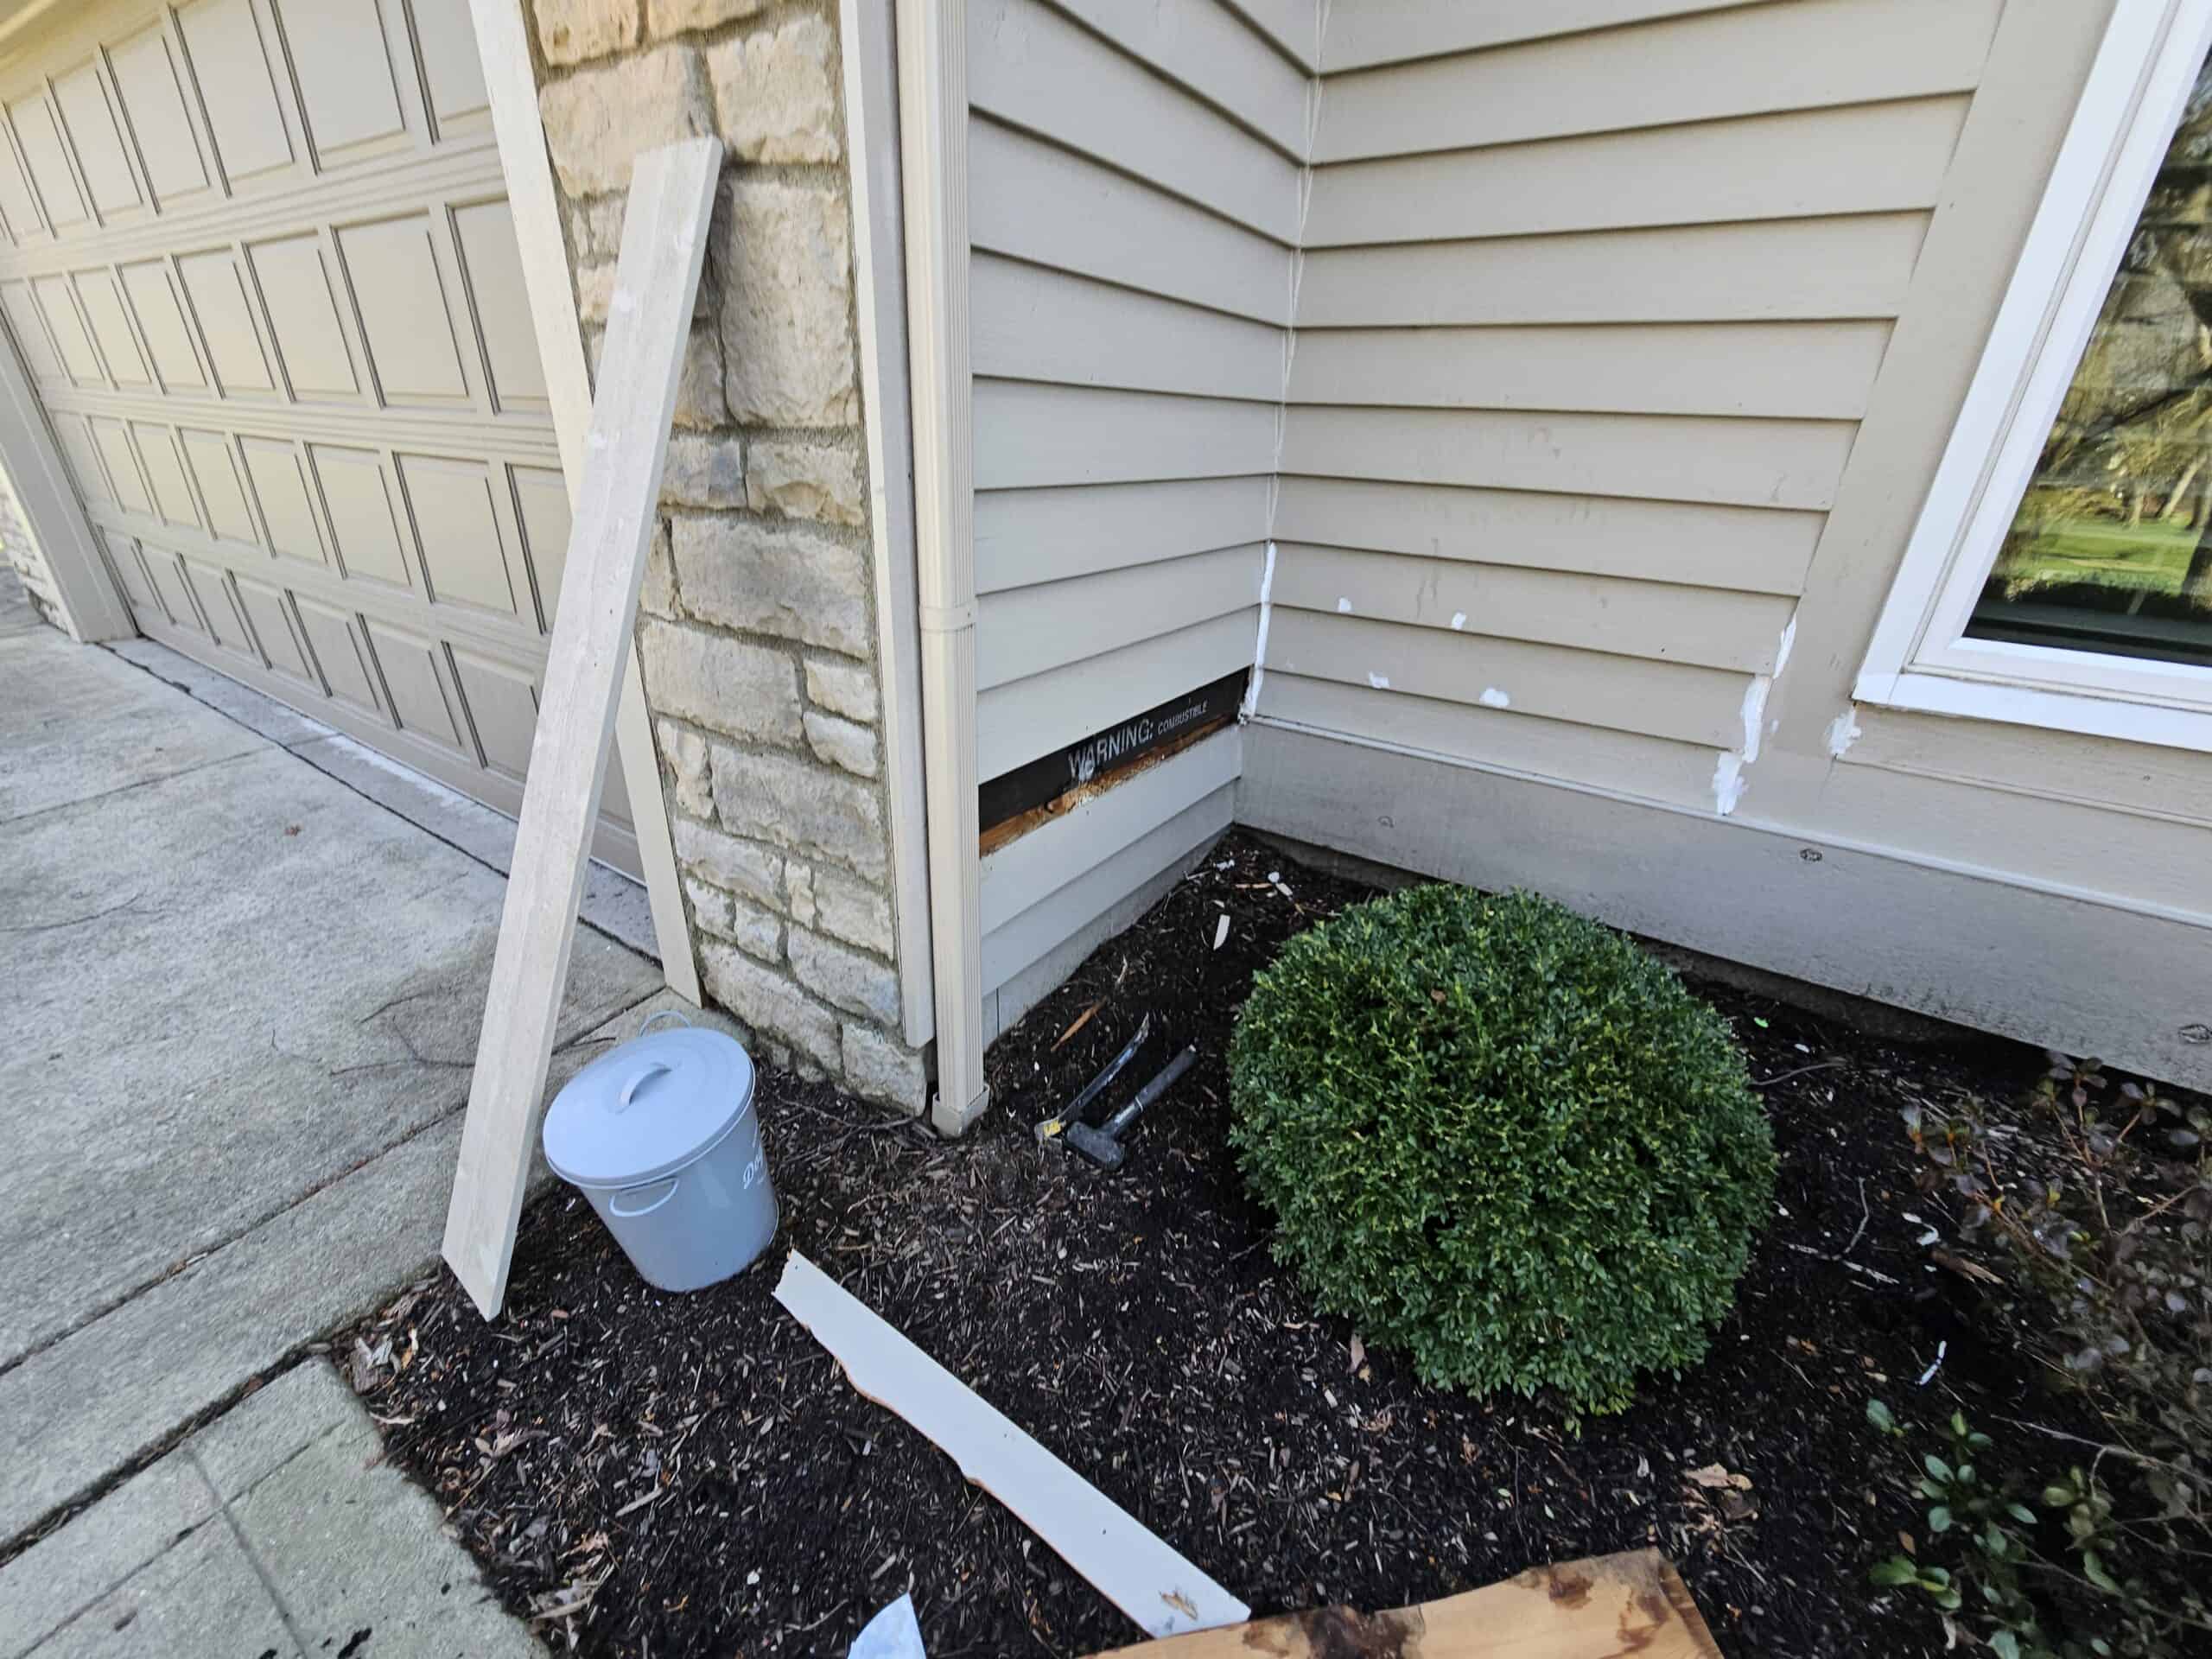
3. Rotting Wood and Soft Spots
Swollen wood, blistered paint, dark stains, spongy spots. Open miters wick water in. Leaking windows or flashing run downstream onto the casing. Bathroom humidity hits unsealed MDF cut ends and turns them fuzzy. Paint will not save rotten substrate. You are papering over a structural problem. Push a screwdriver into any suspect spot. If it sinks in or the wood crumbles, that piece needs to come out, not get painted. Replace the rotten section, treat the source of the moisture, then prep the new piece like new construction. Our trim carpentry crew swaps casing and scribes new pieces to the wall so the seams disappear.
4. Caulk Failure at Seams
Hairline cracks running along every wall-to-trim seam, around door jambs, and at fascia joints. Almost always cheap acrylic caulk that hardened and lost flex within a year. Real fix is acrylic-urethane caulk like Sherwin SherMax or Big Stretch. Acrylic urethane flexes with seasonal wood movement instead of cracking the first time the season changes. Cut out the failing caulk, do not smear new caulk over old.

5. Nail Head Bleed and Popping Fasteners
Rust-colored dots ghosting through the topcoat at every nail head. Galvanized or uncoated steel nails left bare under latex paint. Water gets through the topcoat film, hits the head, rusts, and bleeds back through. Fix is to spot prime every fastener with Zinsser BIN shellac primer before the next coat. BIN locks down rust like nothing else. Skip the latex stain blockers for this one. They bleed through nine times out of ten.
Why Trim Fails: The 5 Root Causes
Surface symptoms above. What is actually causing the failure underneath:
- Moisture infiltration — open miters, failing flashing, unsealed MDF cut ends, and leaking windows put water inside the wood. Paint cannot live on wet substrate.
- Wrong primer or no primer — latex over glossy oil without a bonding primer. Bare wood with no oil primer. Stained or yellowed surfaces with no shellac BIN. Match the primer to the problem.
- Painting over chalky or dirty surfaces — exterior trim collects oxidized paint chalk and pollen. Wipe a finger across it. If it comes back white, that is chalk and the next coat will not bond.
- UV and sun exposure — south and west facing trim takes hammering. Cheap topcoats fade, chalk, and split open in three to five years. Premium acrylic exteriors hold seven to ten.
- Cheap caulk and skipped prep — $2 painter caulk gives out in a season. Skipping the 220-grit scuff sand between coats leaves no tooth for adhesion. Both shave years off the topcoat life.
"Most trim failures are not paint failures. They are prep failures wearing a paint costume."
Save vs Replace: Which Trim Can You Rescue?
Most trim can be saved with proper prep and the right primer. Replacement is the exception, not the rule. Here is how we decide on every walkthrough:
Save It
How PaintWerks Fixes Failing Trim
This is the exact 6-step sequence we run on every interior and exterior trim repaint, single room or whole house. Skip a step and somebody is calling us back in 18 months. For the full prep workflow see our paint prep and repairs guide.
- Scrape. Carbide scraper and 5-in-1 tool on every edge. If it moves it comes off. Pre-1978 homes get treated as lead per EPA RRP rules.
- Sand. 120-grit to feather scraped edges flat, then 220-grit to scuff every piece. This is the step DIYers skip. It is why their paint peels.
- Vacuum and tack. Shop vac every horizontal, reveal, and corner. Wipe with tack cloth. Dust is the silent killer of a paint job.
- Spot prime. BIN shellac for stains, smoke, yellowed oil, and nail heads. Cover Stain for bare wood and knots. Stix when going waterborne over sound old oil. Match primer to problem.
- Caulk. Acrylic-urethane (SherMax or Big Stretch) at every seam, miter, and wall joint. Tool smooth with a wet finger. Skip the $2 tube.
- Two coats topcoat. ProClassic, Cashmere, or Advance in satin or semi-gloss. Always two coats. One coat ghosts the old color through within a year.

Typical Trim Repaint Cost in Columbus
Interior trim repaints in Central Ohio run roughly $3 to $7 per linear foot for prep, primer, caulk, and two coats of a real trim enamel. A single room (baseboards, casings, door trim) lands $300 to $700. Whole house trim repaints land $1,500 to $5,000 depending on linear footage and condition. Exterior trim and fascia is similar per foot but the access, height, and weather windows drive the total higher. For the whole-room interior cost view see our interior painting cost Columbus guide. Commercial mortise door frames are a different conversation entirely (DTM urethane, not wall paint) and live on the commercial painting cost guide.
What's Typically Excluded From a Trim Repaint Quote
These items usually need to be called out as add-alternates or carved out as homeowner responsibility:
- Rotten wood replacement (carpentry not paint)
- New construction casing or backband installation
- Lead paint testing and abatement (pre-1978 homes)
- Window glazing repair and putty replacement
- Flashing, gutter, and water-source repairs
- Stain stripping on stained-and-sealed trim (different scope)
- Cabinet, door slab, and interior shutter painting (separate scope)
- Hardware removal and reinstallation beyond switch plates
As a licensed Ohio general contractor, we can handle the carpentry, the trim replacement, and the paint under one contract instead of stopping the project to bring in a second trade. For a buyer-side checklist on evaluating any quote, see how to read a contractor quote: red flags.
Frequently Asked Questions
Almost always latex shot over old oil paint with no bonding primer. Pre-2000 trim in Columbus homes is usually oil alkyd. If somebody rolled latex over it without scuff sanding and a bond primer like INSL-X Stix, the new film could not grab. Dab denatured alcohol on a hidden spot. If finish softens or transfers it is latex. If nothing happens it is oil and needs the bonding primer.
Repainted, almost always. Spot prime with shellac-based Zinsser BIN to lock down the yellow, then two coats of fresh white trim enamel. Latex stain blockers and water-based primers bleed through nine times out of ten. BIN is the only consistent fix.
A single room runs one to two days with full prep, prime, caulk, and two coats. A whole-house trim repaint typically runs four to seven working days depending on linear footage, existing condition, and whether cabinets are part of the scope.
For brush and roll: Sherwin-Williams ProClassic or Cashmere in satin or semi-gloss. For spray: Benjamin Moore Advance levels like a mirror. Both are waterborne alkyds. They flow like oil but clean up with water. Skip the cheap acrylics for trim. They flash and leave brush marks.
Yes. 220-grit between every coat. It knocks down dust nibs, evens out brush marks, and gives the next coat tooth to grab. Skipping it is why a homeowner DIY looks rough next to a pro job.
Repaint unless the wood is rotten, structurally compromised, or so badly damaged the profile is lost. Probe with a screwdriver. If it sinks in, replace. If it holds, it can be saved with proper prep. Most trim that looks bad is just bad paint over good wood.
$3 to $7 per linear foot for most interior trim repaints, including prep, prime, caulk, and two coats. A single room runs $300 to $700. Whole-house jobs run $1,500 to $5,000 depending on linear footage, condition, and whether doors and cabinets are in scope.
Different scope entirely. Commercial hollow metal door frames need a zinc-phosphate rust-inhibiting primer (Pro-Cryl Universal or similar) followed by two coats of high-performance DTM urethane. A wall paint applied to a metal mortise frame will chip at the strike plate within 18 months. See our commercial painting cost guide for the commercial side.
Get Your Trim Fixed Right
If your trim is peeling, cracking, yellowing, or just past it, the fix starts with a walkthrough. Forty-five minutes onsite. Honest spec on what needs prep, primer, and product. Real price. PaintWerks handles interior and exterior trim across Columbus and Central Ohio. Residential and commercial. Same standard.
See our full residential painting services or schedule below.